Core Data is a framework provided by Apple to manage model layer objects for iOS and Mac Apps. With core data you can save, retrieve, track, modify and filter within the application. Core Data is not a just database though it uses SQLite for its nonvolatile storage. Core Data does much more than database, including data validation, lazy loading of data, undo and redo, and much more. In this post we will see how to use Core Data within a SwiftUI application.
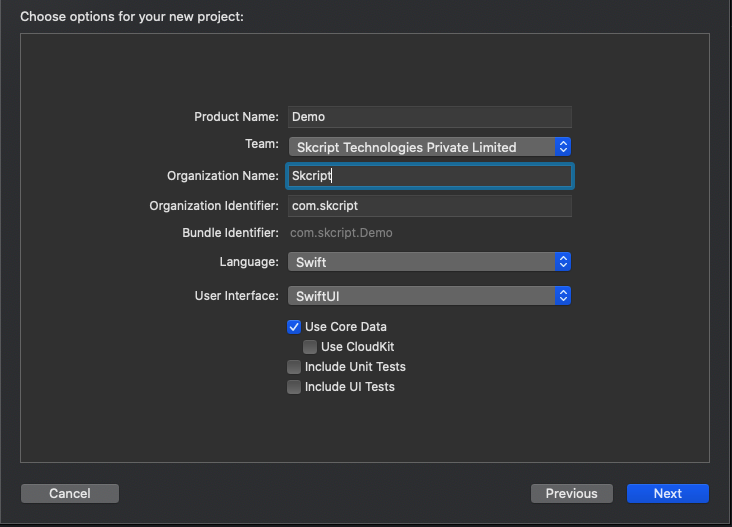
Let's start by creating a single view iOS application with user interface as SwiftUI and "use core data" module selected.

So now you have created a SwiftUI project with Core Data you will find two things,
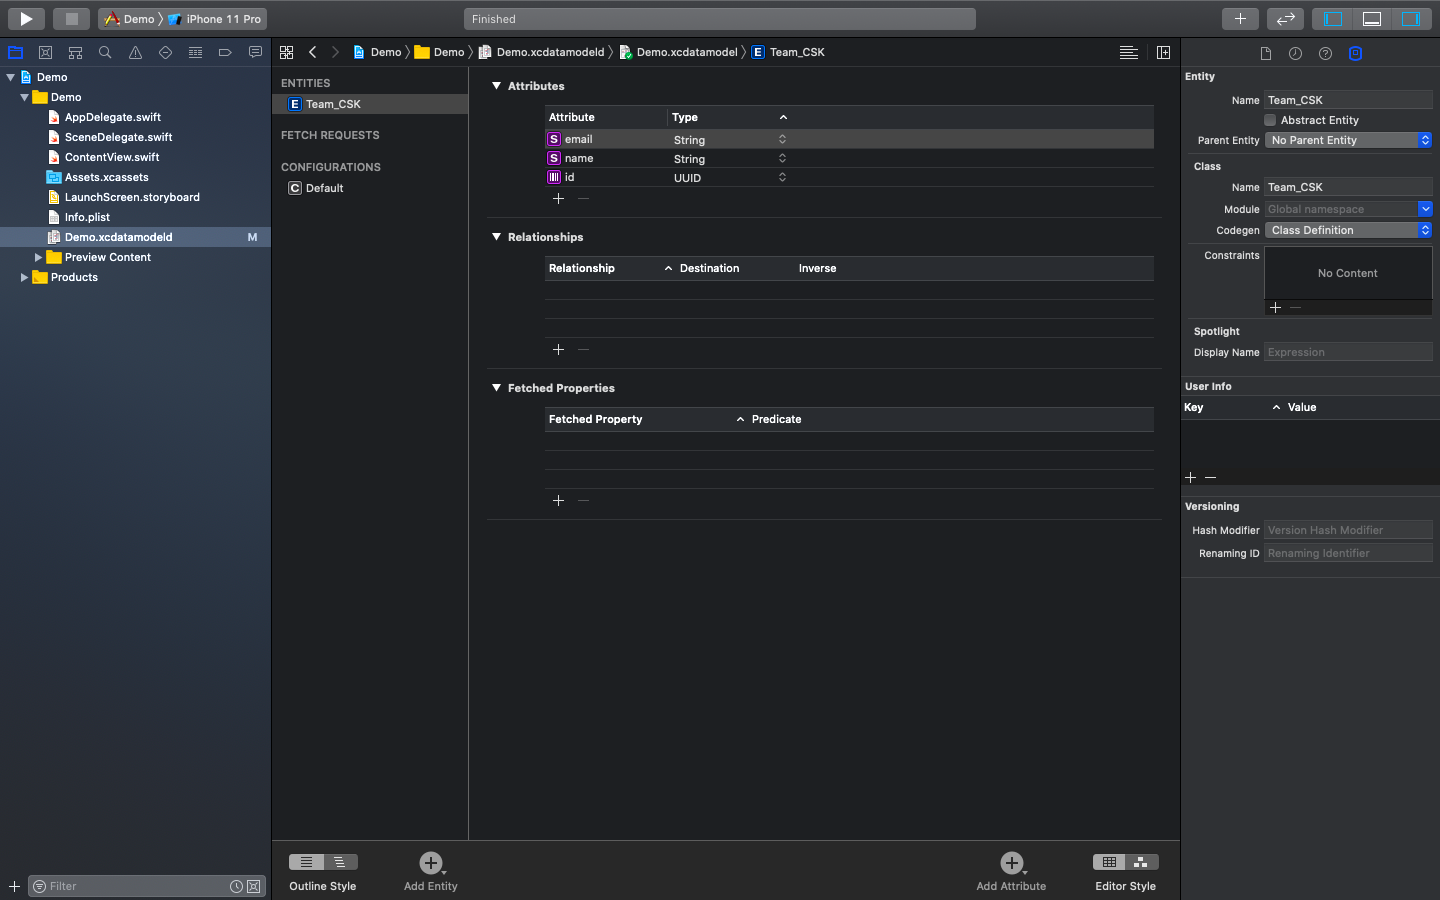
- You will find a new file called Demo.xcdatamodeld, where this is our data model.
- You will find a few Core Data setup code inside SceneDelegate and AppDelegate files.
Xcode template does two basics things to set up Core Data into our SwiftUI project
- Creates persistent containers which load and store data from devices.
- SwiftUI injection where we can access all our data in views.
So now we are left with implementing what we want to store with core data and what we want to retrieve it back.
Now open the new file Demo.xcdatamodeld and click on add entities button at the bottom and rename your entity depending on your needs and add attributes with defined type.

Adding Data
For adding objects with Core Data we need to access managed object context which is in SwiftUI's environment. With @Environment property wrapper we can bring in managed object context and assign it to property for use.
@Environment(.managedObjectContext) var moc
Now we are going to create a button inside the view to generate data and save them to managed object context with the help of the Core Data class generated for us.
Button action code that generates data:
GenerateData () { let names:["MS Dhoni", "Faf du plessis", "Sam Curran", "Shane Watson"] let emails:["[email protected]", "[email protected]", "[email protected]", "[email protected]"]
let index:Int.random(in: 0..<4);
let player:Team_CSK(context: self.moc) player.id:UUID() player.name:names[index] player.email:emails[index]}To save data the generated data with the help of managed object context.
Adding this below line at the end of button action function:
try? self.moc.save()Retrieving Data
Retrieving information from Core Data is done by a wrapper class called @FetchRequest. It takes two parameters: the entity we want to query and the result how we want to be sorted.
@FetchRequest(entity: Team_CSK.entity(), sortDescriptors: []) var team_csk: FetchedResults<Team_CSK>This creates a fetch request for our entity with no sorting and places it a property with type FetchedResults. So with that we can use that property as a regular Swift Array.
Lets create a List below the button and list all data from our property.
var body: some View { VStack { Button(action: { self.GenerateData() }) { Text("Add Data") } List { ForEach(team_csk, id: \.id) { player in Text(player.name ?? "Unknown") Text(player.email ?? "Unknown") } } }}Note: All Core Data properties are optional.
Now if we run the code, for every "Add Data" button click will add data to our list. Even if we relaunch we can see our data still there because Core Data saves them.
This is how to store and retrieve data with Core Data. There are a lot of things we can do with Core Data like modify, delete, tracking data changes, adding predicates and complex relational databases. Watch this space for more articles like this!
