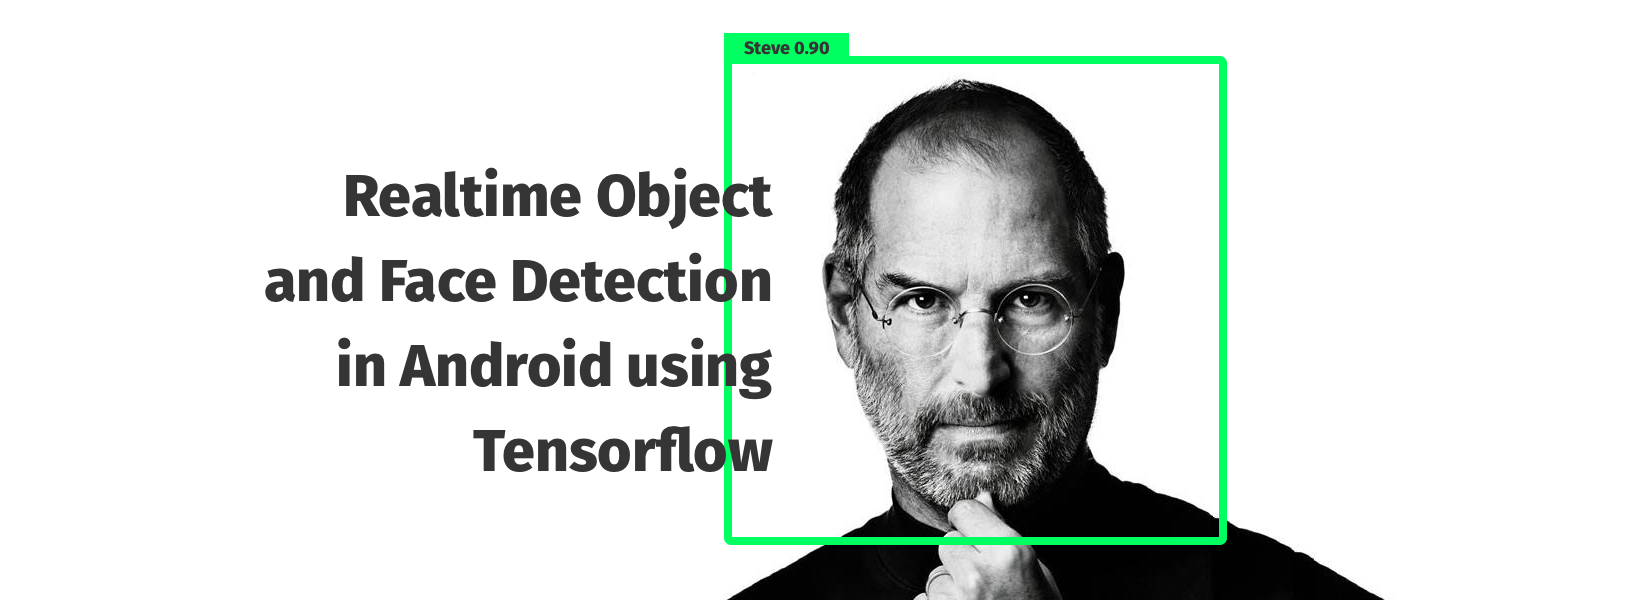
Artificial Intelligence is one of the breakthrough tech in computer science milestones among all their achievements. Image Recognition was a challenging part for the machine to detect objects. In this century, many computing resources and intelligent algorithms make it easy. But the feature will be only for those who have specifically configured machines to detect objects. After the release of Tensorflow Lite on Nov 14th, 2017 which made it easy to develop and deploy Tensorflow models in mobile and embedded devices - in this blog we provide steps to a develop android applications which can detect custom objects using Tensorflow Object Detection API.
Requirements
- Android Studio Installing Android Studio in your System(SDK Version >=27 and NDK Version >=16)
- Tensorflow Installing Tensorflow
- CPU (Intel i7,8GB RAM)or GPU (if you cannot prefer this configuration, try Google Cloud Platform of free $300 credits) to train the model.
- Labelimg (To annotate the image by boundary box)
Before You Get Started
Since the project is full of work with Python codes, libraries and API it's a good methodology to work in a Python virtual environment and we use pip to install Python package make sure you installed it.
PIP installation:
- To install pip, securely download get-pip.py
- Then run the following:
python get-pip.py - Check you have correctly installed pip by checking its version:
pip --version
Python Virtual Environment installation:
-
Install virtualenv via pip:
$ pip install virtualenv -
Test your installation:
$ virtualenv --version -
Create a virtual environment for a project:
$ virtualenv tensor_android -
Activating the Environment:
$ cd tensor_android$ source bin/activate -
To deactivate:
$ deactivate
If you completed all the steps mentioned above you have to see the ouput like this in your terminal or command prompt:

To know more about python virtual environment feel free to visit this link.
Step 1 - Collect Data:
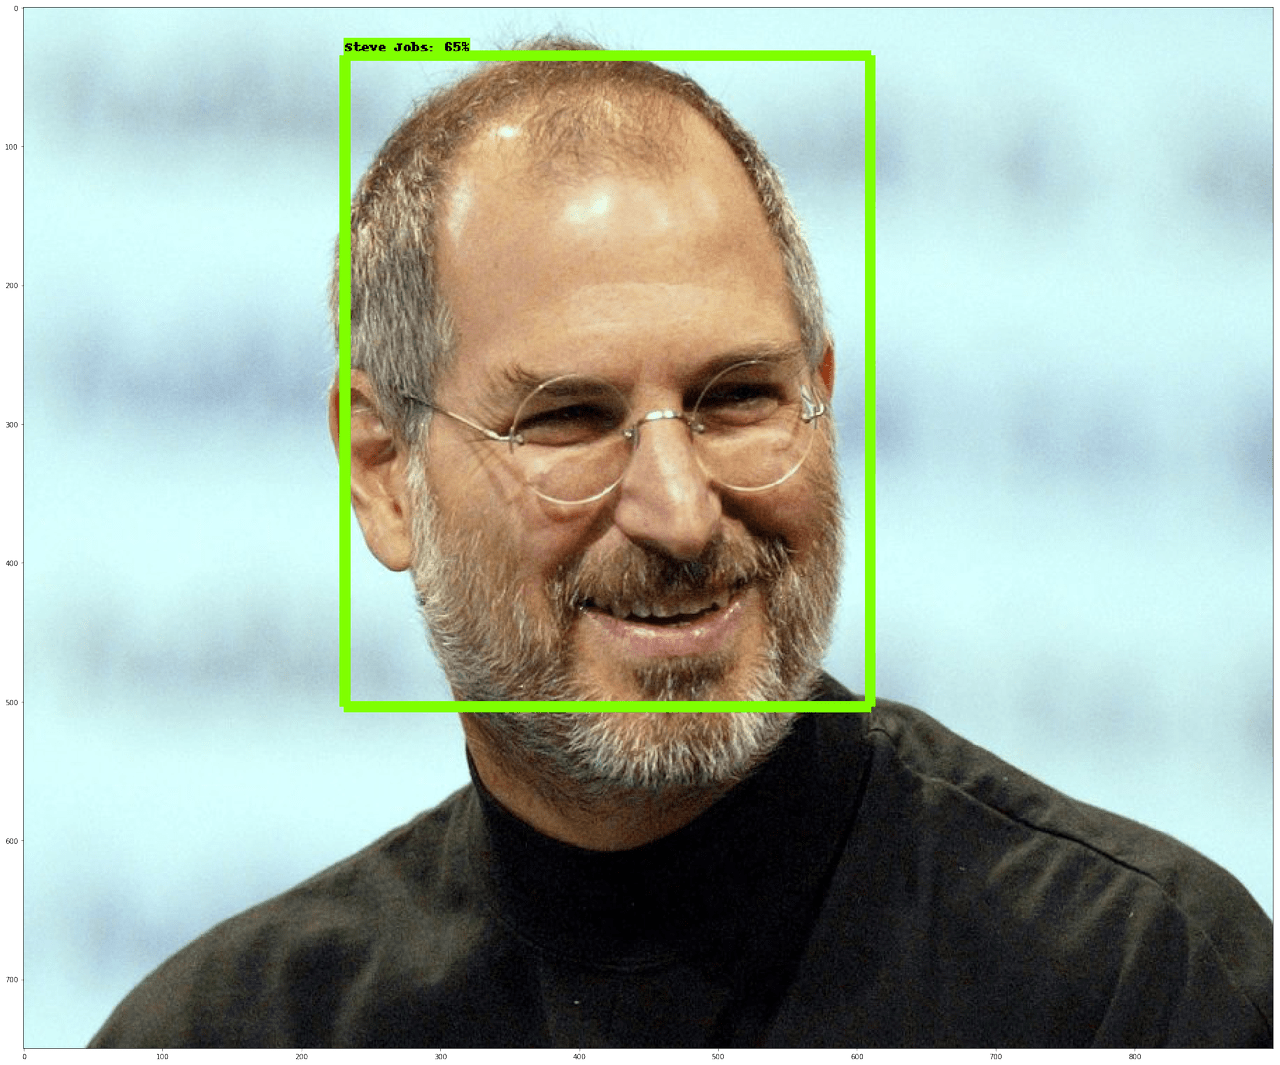
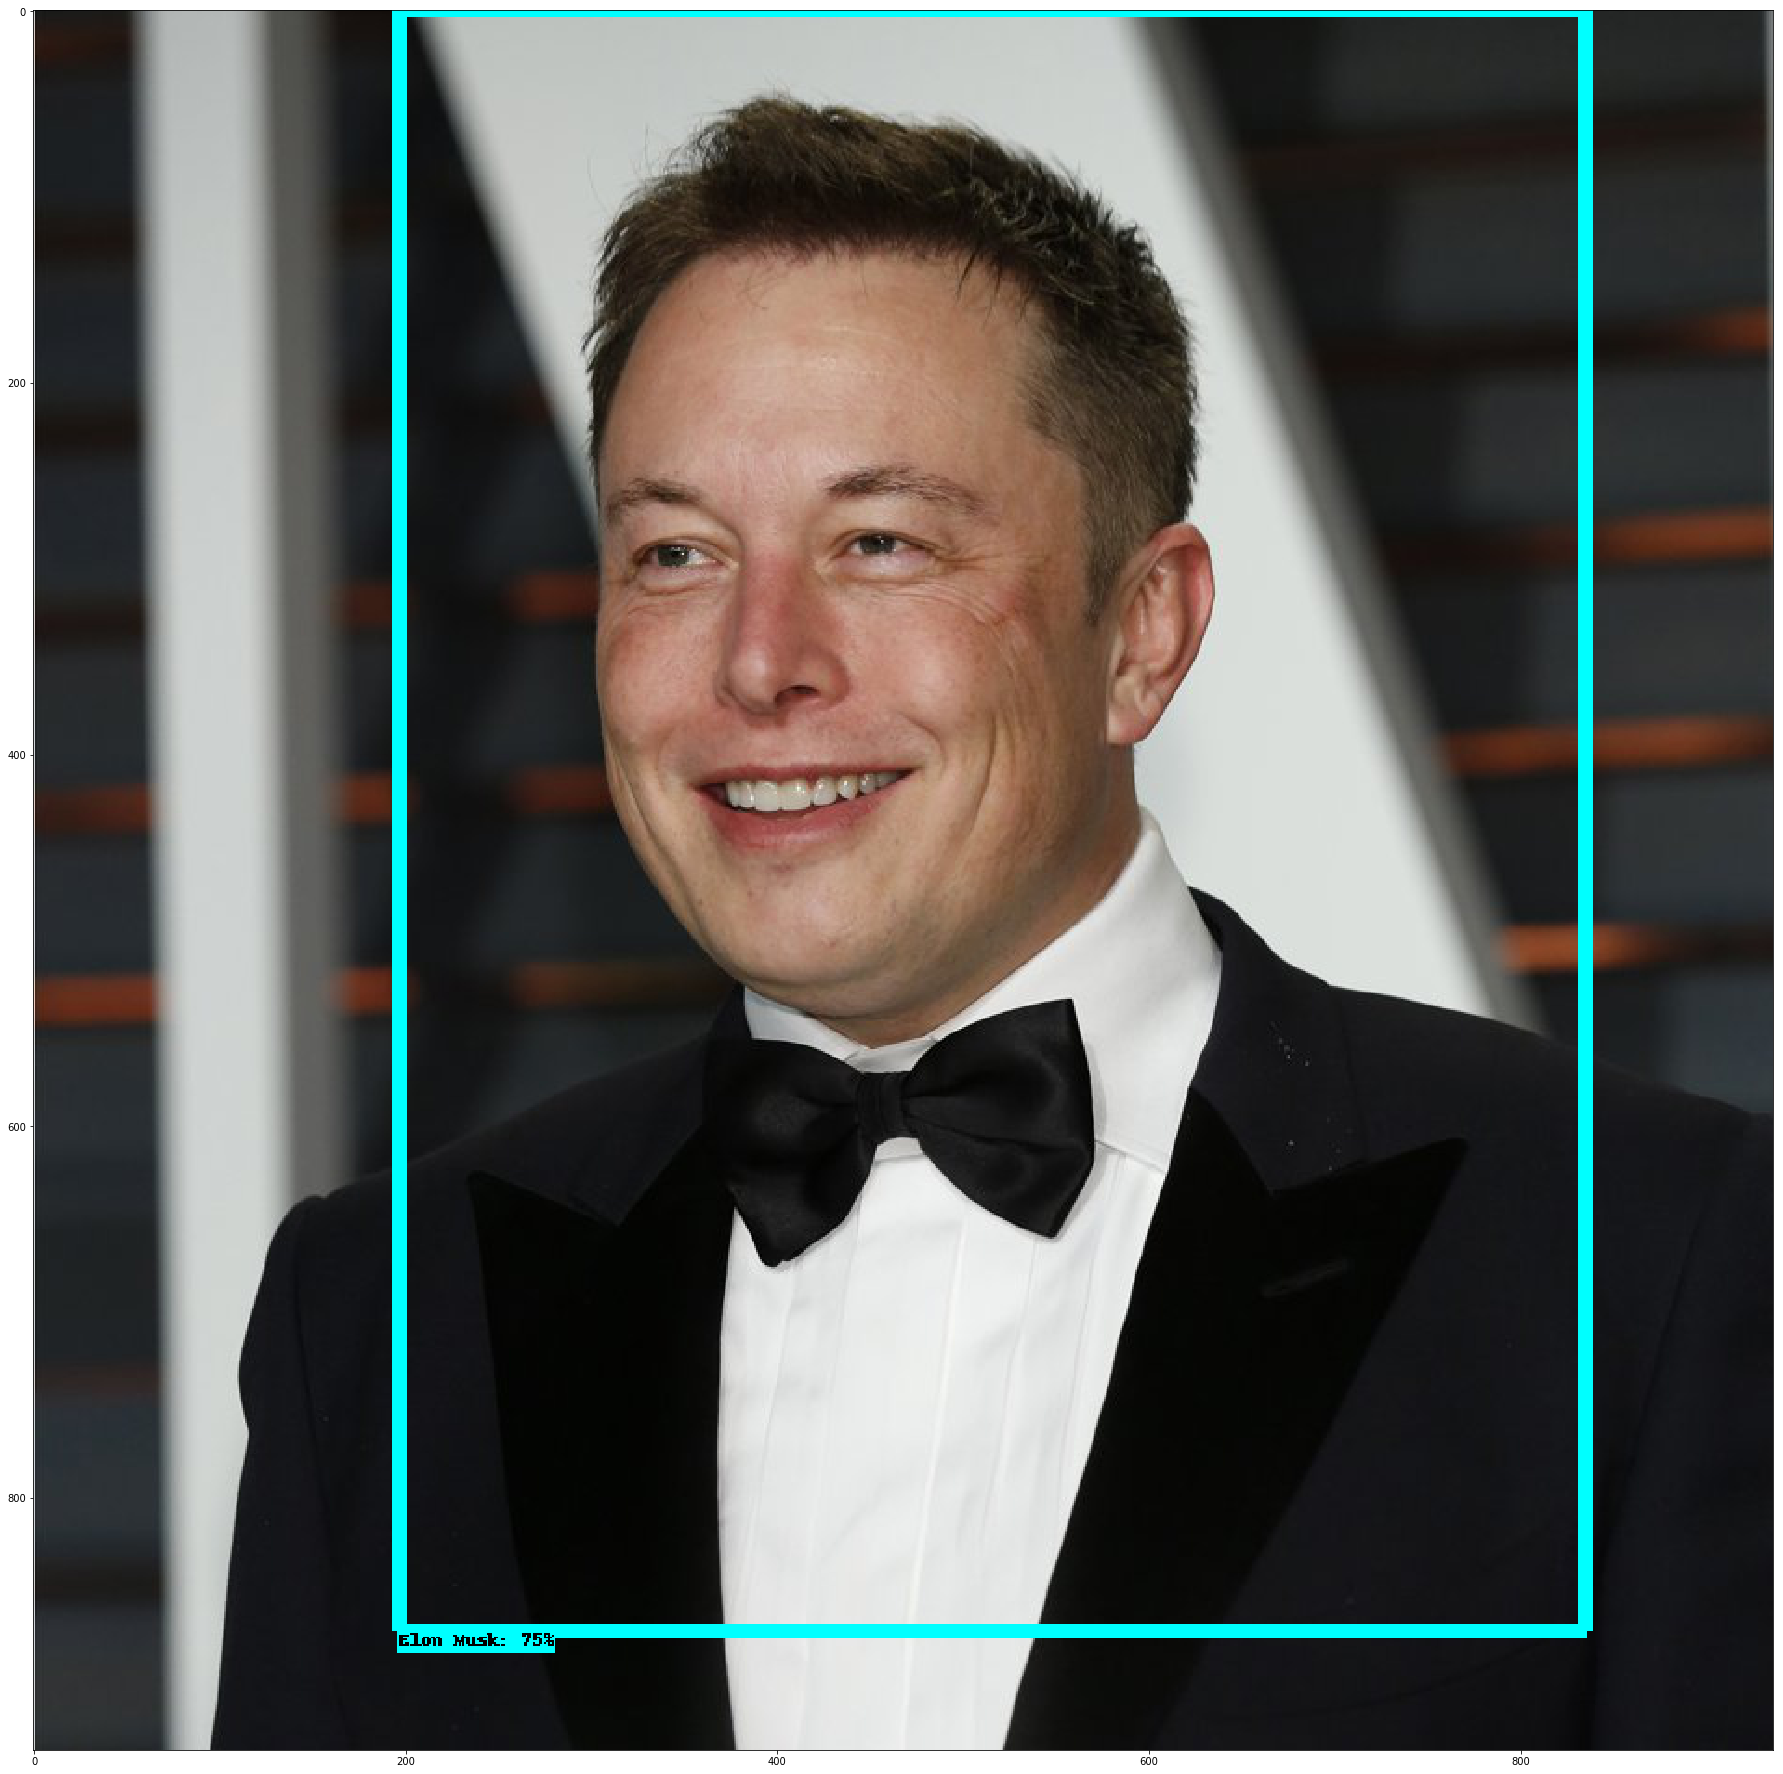
In this project, we are going to work with custom images so I'm collecting images of Steve jobs and Elon Musk for it. After collecting all the images, annotate or box the object which you have to detect in the image using Labelimg and save both the .jpeg and .xml file of it in the image folder.
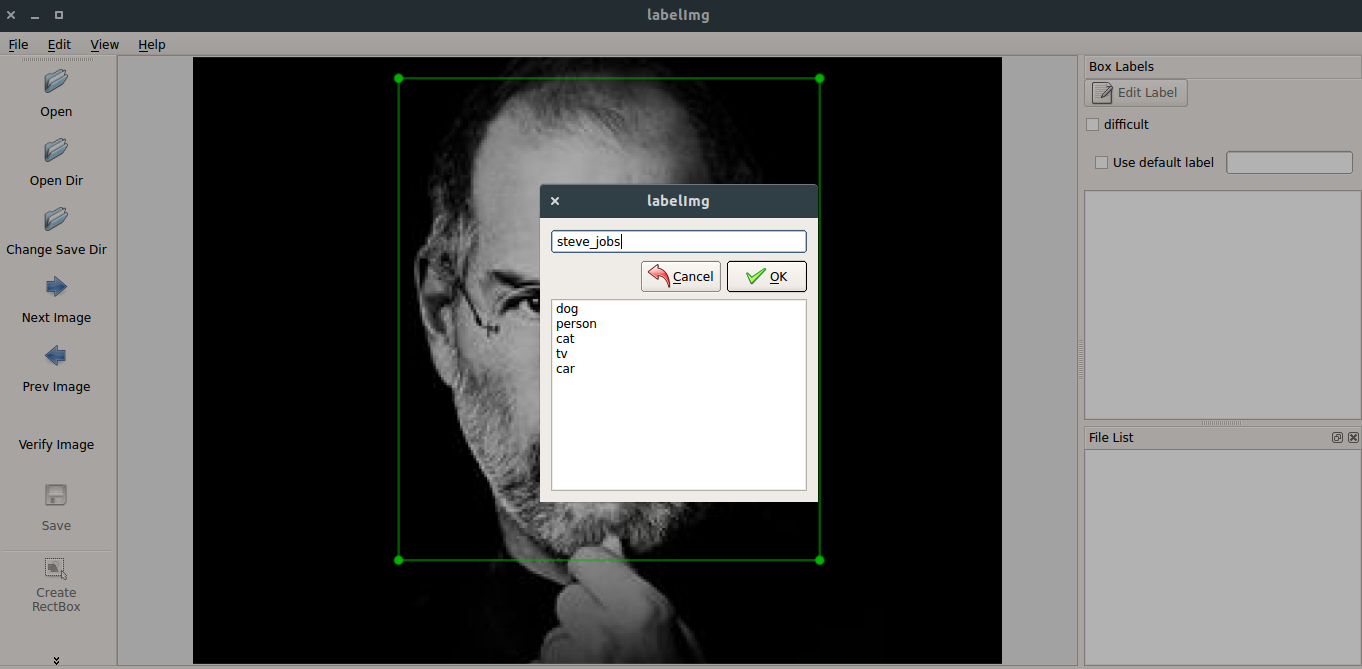
After creating a boundary box of an object, we get .xml file of it, it's called as annotation file which will be used to specify the region where the classifier should focus on and it will be looking like this. The boundary box notation will be xmin,ymin,xmax,ymax.
<annotation> <folder>steve_jobs</folder> <filename>14_steve-jobs.jpg</filename> <path>"path of the image"</path> <source> <database>Unknown</database> </source> <size> <width>1024</width> <height>768</height> <depth>3</depth> </size> <segmented>0</segmented> <object> <name>steve jobs</name> <pose>Unspecified</pose> <truncated>0</truncated> <difficult>0</difficult> <bndbox> <xmin>270</xmin> <ymin>9</ymin> <xmax>753</xmax> <ymax>642</ymax> </bndbox> </object></annotation>We successfully collected the required data and annotated it. Now we have to convert the images from xml file to a single csv file, because the file conversion is in this manner .jpeg >.xml > .csv > .record. So we have to convert it, I provided the code to convert the xml's below.
import osimport globimport pandas as pdimport xml.etree.ElementTree as ET
def xml_to_csv(path): xml_list:[] for xml_file in glob.glob(path + '/*.xml'): tree:ET.parse(xml_file) root:tree.getroot() for member in root.findall('object'): value:(root.find('filename').text, int(root.find('size')[0].text), int(root.find('size')[1].text), member[0].text, int(member[4][0].text), int(member[4][1].text), int(member[4][2].text), int(member[4][3].text) ) xml_list.append(value) column_name:['filename', 'width', 'height', 'class', 'xmin', 'ymin', 'xmax', 'ymax'] xml_df:pd.DataFrame(xml_list, columns=column_name) return xml_df
def main(): for directory in ['train','test']: image_path:os.path.join(os.getcwd(), 'images/{}'.format(directory)) xml_df:xml_to_csv(image_path) #Storing the csv file into the data directory. xml_df.to_csv('data/{}.csv'.format(directory), index=None) print('Successfully converted xml to csv.')
main()To save the data file create another data directory in your project file, so its normally easy to organize otherwise save as you wish. But when you create the data directory, create an empty train.csv and test.csv into it. Next step is to convert the csv file to tfrecord file because Tensorflow have many functions when we use our data file in a tfrecord format. I've given the code below to convert the .csv to .record or .tfrecord.
import osimport ioimport pandas as pdimport tensorflow as tf
from PIL import Imagefrom object_detection.utils import dataset_utilfrom collections import namedtuple, OrderedDict
flags:tf.app.flagsflags.DEFINE_string('csv_input', '', 'Path to the CSV input')flags.DEFINE_string('output_path', '', 'Path to output TFRecord')FLAGS:flags.FLAGS
def class_text_to_int(row_label): #if you working with your own classes chenge the label if row_label == 'steve jobs': return 1 elif row_label == 'elon musk': return 2 else: return None
def split(df, group): data:namedtuple('data', ['filename', 'object']) gb:df.groupby(group) return [data(filename, gb.get_group(x)) for filename, x in zip(gb.groups.keys(), gb.groups)]
def create_tf_example(group, path): with tf.gfile.GFile(os.path.join(path, '{}'.format(group.filename)), 'rb') as fid: encoded_jpg:fid.read() encoded_jpg_io:io.BytesIO(encoded_jpg) image:Image.open(encoded_jpg_io) width, height:image.size
filename:group.filename.encode('utf8') image_format:b'jpg' xmins:[] xmaxs:[] ymins:[] ymaxs:[] classes_text:[] classes:[]
for index, row in group.object.iterrows(): xmins.append(row['xmin'] / width) xmaxs.append(row['xmax'] / width) ymins.append(row['ymin'] / height) ymaxs.append(row['ymax'] / height) classes_text.append(row['class'].encode('utf8')) classes.append(class_text_to_int(row['class']))
tf_example:tf.train.Example(features=tf.train.Features(feature={ 'image/height': dataset_util.int64_feature(height), 'image/width': dataset_util.int64_feature(width), 'image/filename': dataset_util.bytes_feature(filename), 'image/source_id': dataset_util.bytes_feature(filename), 'image/encoded': dataset_util.bytes_feature(encoded_jpg), 'image/format': dataset_util.bytes_feature(image_format), 'image/object/bbox/xmin': dataset_util.float_list_feature(xmins), 'image/object/bbox/xmax': dataset_util.float_list_feature(xmaxs), 'image/object/bbox/ymin': dataset_util.float_list_feature(ymins), 'image/object/bbox/ymax': dataset_util.float_list_feature(ymaxs), 'image/object/class/text': dataset_util.bytes_list_feature(classes_text), 'image/object/class/label': dataset_util.int64_list_feature(classes), })) return tf_example
def main(_): writer:tf.python_io.TFRecordWriter(FLAGS.output_path) path:os.path.join(os.getcwd(), 'images') examples:pd.read_csv(FLAGS.csv_input) grouped:split(examples, 'filename') for group in grouped: tf_example:create_tf_example(group, path) writer.write(tf_example.SerializeToString())
writer.close() output_path:os.path.join(os.getcwd(), FLAGS.output_path) print('Successfully created the TFRecords: {}'.format(output_path))
if __name__ == '__main__': tf.app.run()That's great we completed the data processing! Now you need to have two files in your data folder train.record and test.record as your final output of this step.
Second Step - Creating and Training your model:
It's a tedious process to create a convolutional net, feed your data and train it and also we cannot achieve a good accuracy when we develop the net on our own. So we are going to use Google pre-trained model called ssd_mobilenet_v1_coco. We use the model and config file of it in our project.
Link to download the files:
Create a training folder in your project, move the config file into it. Then create another file in training folder called object_label.pbtxt which defines the labels of the class during testing the model. The object_label should contain:
item{ id: 1 name: 'Steve Jobs'}item{ id: 2 name: 'Elon Musk'}When you extract the ssd_mobilenet file you get all the pre-trained models. Now we have to make some changes of the config file. But in this config file I already changed it. If you want make changes for your images follow this step.
- This part in the config file describes how many classes we are going to use, since we used Steve and Elon so it's 2; rest all remains the same.
sd{num_classes: 2box_coder { faster_rcnn_box_coder { y_scale: 10.0 x_scale: 10.0 height_scale: 5.0 width_scale: 5.0 }}}-
Change some values in this part of config file to reduce the complexity because ssd_mobilenet is trained for 90 classes and it has high configuration values so we need not use that much value so change it.
batch_size:15
num_steps:300
But remember the more you train more you get accuracy - 300 is enough for us to train .
train_config: { batch_size: 15 #Change the Batch size optimizer { rms_prop_optimizer: { learning_rate: { exponential_decay_learning_rate { initial_learning_rate: 0.001 decay_steps: 800720 decay_factor: 0.95 } } momentum_optimizer_value: 0.9 decay: 0.9 epsilon: 1.0 } } fine_tune_checkpoint: "ssd_mobilenet_v1_coco_11_06_2017/model.ckpt" from_detection_checkpoint: true # Note: The below line limits the training process to 200K steps, which we # empirically found to be sufficient enough to train the pets dataset. This # effectively bypasses the learning rate schedule (the learning rate will # never decay). Remove the below line to train indefinitely. num_steps: 300 #Number of steps to train data_augmentation_options { random_horizontal_flip { } } data_augmentation_options { ssd_random_crop { } }}- Make some path changes in this part if you require, otherwise leave it as is for this project.
train_input_reader: { tf_record_input_reader { input_path: "data/train.record" #path of our train record } label_map_path: "training/object_detection.pbtxt"}
eval_config: { num_examples: 2000 # Note: The below line limits the evaluation process to 10 evaluations. # Remove the below line to evaluate indefinitely. max_evals: 10}
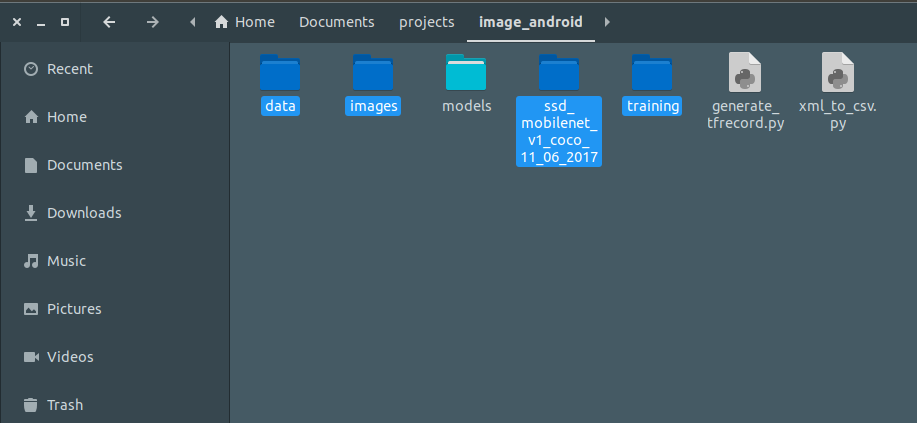
eval_input_reader: { tf_record_input_reader { input_path: "data/test.record" #path of our test record } label_map_path: "training/object_detection.pbtxt" shuffle: false num_readers: 1}Great! Now we made all our configuration for the project. We have to download the Tensorflow object detection API (TensorFlow Object Detection API) as we need only their object models, I have downloaded and it will be available at this link. Now extract the models zip file and store it in your project folder.
- Installing the model in your system: Navigate to the models directory
$ cd image_android/models
Run, $ python setup.py install
Now you get all the required properties installed to run the API in your system.
- Copy the folder which I selected in the project folder and move it to the object_detection folder inside models folder.
- Then do some quiet steps for configuring protobuf and installing all necessary Library:
Note: You should be in your python virtual environment while executing these command
$ cd "PATH TO THE MODELS FOLDER"
$ sudo apt-get install protobuf-compiler python-pil python-lxml
$ sudo pip install pillow
$ sudo pip install lxml
$ sudo pip install jupyter
$ sudo pip install matplotlib
$ protoc object_detection/protos/*.proto --python_out=.
$ export PYTHONPATH=$PYTHONPATH:pwd:pwd/slim
- All set, ready to Train your model.
$ python train.py --logtostderr --train_dir=training/ --pipeline_config_path=training/ssd_mobilenet_v1_pets.config
where, logtostderr - it defines that to store the log data
- After successful training, you can view your model reports in Tensorboard.
From
models/object_detection, via terminal, you start TensorBoard with:$ tensorboard --logdir='training'
Step 3 - Testing and Exporting the model:
Now we created a model which detects Steve or Elon in the image, but we didn't see our output Here comes the testing. Before testing we should create an inference graph.
-
Go to
models/object_detectiondirectory, there is a script that does this for us:export_inference_graph.py -
Run the code in your terminal:
python export_inference_graph.py--input_type image_tensor--pipeline_config_path training/ssd_mobilenet_v1_pets.config--trained_checkpoint_prefix training/model.ckpt-10856--output_directory steve_elonwhere,
—trained_checkpoint_prefix is the latest ckpt in the training folder
—output__directory defines the directory where the inference graph should be saved
-
If you get an error about
no module named 'nets', go tomodels/,then you need to re run:$ protoc object_detection/protos/*.proto --python_out=. $ export PYTHONPATH=$PYTHONPATH:
pwd:pwd/slim -
Now collect some images for testing, in my case I gathered about 4 images of Elon and Steve and saved in
models/object_detection/test_imagesfolder and renamed them to image1, image2 etc. iteratively. -
Run the jupyter Notebook,
$ jupyter notebook -
Navigate to project
models/object_detectionopen object_detection_tutorial.ipynb -
Make some changes in it ,the edited one is available in this link
-
Run all the cell ,the final output look like this:

Cool ,at last we created a successful model now our job is to deploy in a android app.
Last Step, Deploying in Android:
Explanations:
Few important pointers that we should know:
- The core of the TensorFlow is written in c++.
- In order to build for Android, we have to use JNI(Java Native Interface) to call the c++ functions like loadModel, getPredictions, etc.
- We will have a .so(shared object) file which is a c++ compiled file and a jar file which will consist of JAVA API that will be calling the native c++. And then, we will be calling the JAVA API to get things done easily.
- So, we need the jar(Java API) and a .so(c++ compiled) file.
- We must have the pre-trained model file and a label file for the classification
Procedures:
-
First clone the tensorflow android repo from this link and store in your project folder:
git clone --recurse-submodules https://github.com/tensorflow/tensorflow.git
-
Get installed Android Studio
-
Download the latest version of the NDK
-
Install Bazel from here. Bazel is the primary build system for TensorFlow.
-
Change the version of SDK and NDK in tensorflow workspace file. The workspace file will be available in the tensorflow directory.
# Uncomment and update the paths in these entries to build the Android demo.#android_sdk_repository(# name: "androidsdk",# api_level:23,# build_tools_version: "25.0.1",# # Replace with path to Android SDK on your system# path: "<PATH_TO_SDK>",#)##android_ndk_repository(# name="androidndk",# path="<PATH_TO_NDK>",# api_level=14)Example: For SDK,
android_sdk_repository( name: "androidsdk", api_level:23, build_tools_version: "27.0.1", # Replace with path to Android SDK on your system path: "/Users/robinreni/Android/SDK",)For NDK,
android_ndk_repository( (name = 'androidndk'), (path = '/Users/robinreni/Downloads/android-ndk-r15/'), (api_level = 15))- Create a temp_folder and create a object_label.txt and type :
Unknown Steve Jobs Elon Musk
- Copy the frozen_inference_graph.pb in steve_elon folder and move it to the temp_folder and rename it as steve_elon.pb
- Build the .so file using bazel through this command:
$ bazel build -c opt //tensorflow/contrib/android:libtensorflow_inference.so --crosstool_top=//external:android/crosstool --host_crosstool_top=@bazel_tools//tools/cpp:toolchain --cpu=armeabi-v7a
- The library will be located at:
bazel-bin/tensorflow/contrib/android/libtensorflow_inference.so Move the libtensorflow_inference.so file to the temp_folder
- Build the Java counterpart:
$ bazel build //tensorflow/contrib/android:android_tensorflow_inference_java
- You can find the JAR File at:
bazel-bin/tensorflow/contrib/android/libandroid_tensorflow_inference_java.jar Move the libandroid_tensorflow_inference_java.jar file to the temp_folder
- Now you should these file in your temp_folder:
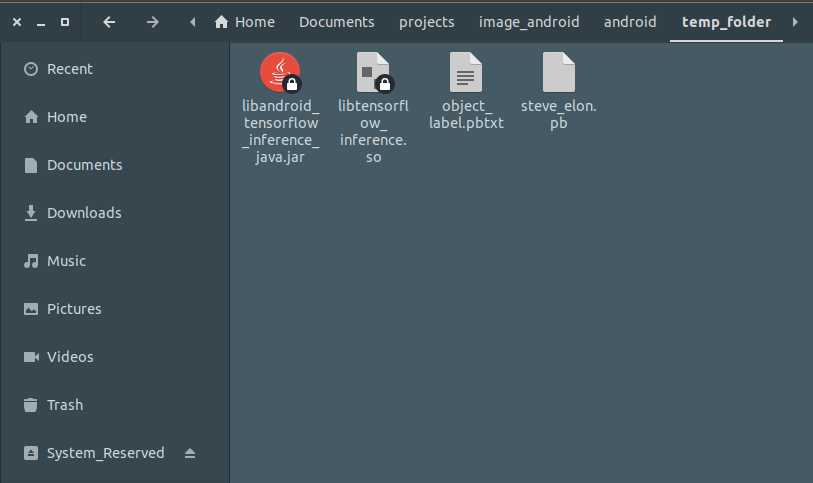
-
You have collected all your necessary resource files for your android implementation.Now open your Android Studio and Click open the existing project and navigate to :
tensorflow/tensorflow/example/androidand open it.You have the pre-built Tensorflow demo modues applied in the android application . -
Create an assets folder under your app project and move your steve_elon.pb(model file) and object_label.txt (label file) to it.
-
Next step move your libtensorflow_inference.so and libandroid_tensorflow_inference_java.jar into your app project folder
-
Click the libandroid_tensorflow_inference_java.jar and choose "Add As Library"

- Click the libtensorflow_inference.so and choose Link C++ Project with Gradle . Then a CMake dialog box opens give the path of the CMake.txt .Refer the below image
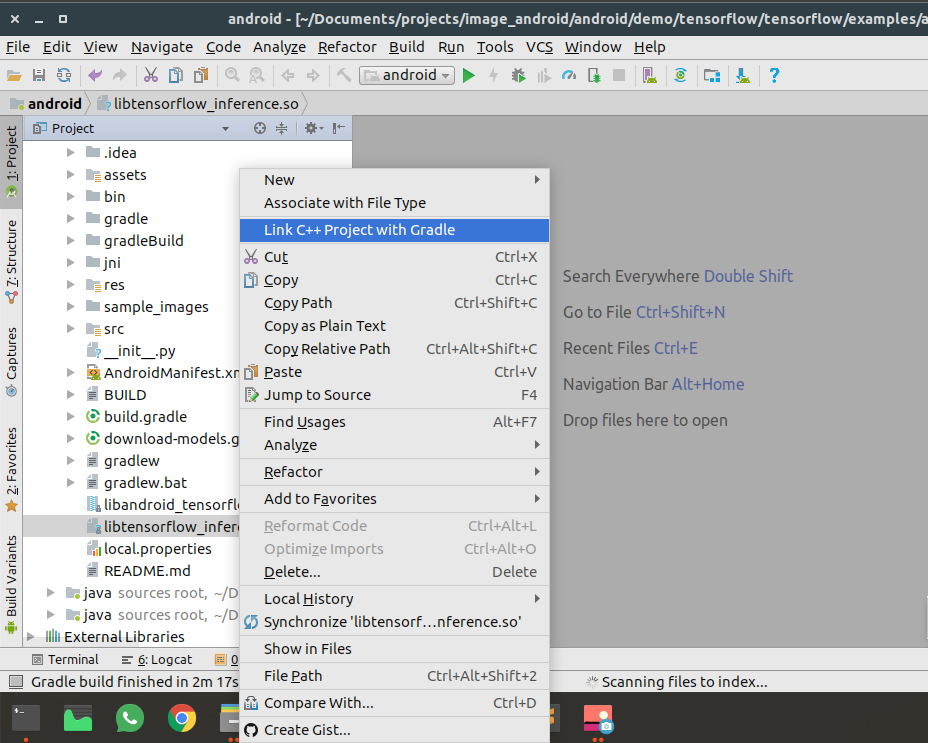
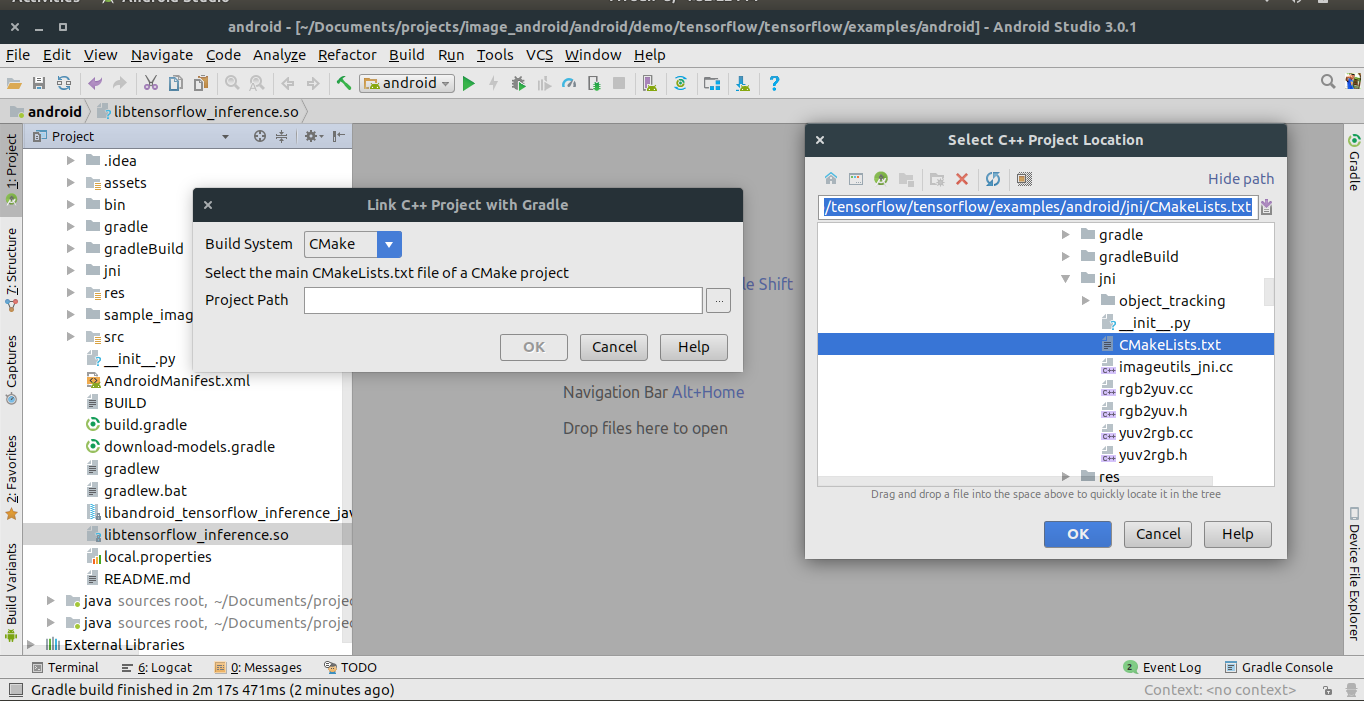
Now the .so file is built with your project. Let's change some configurations
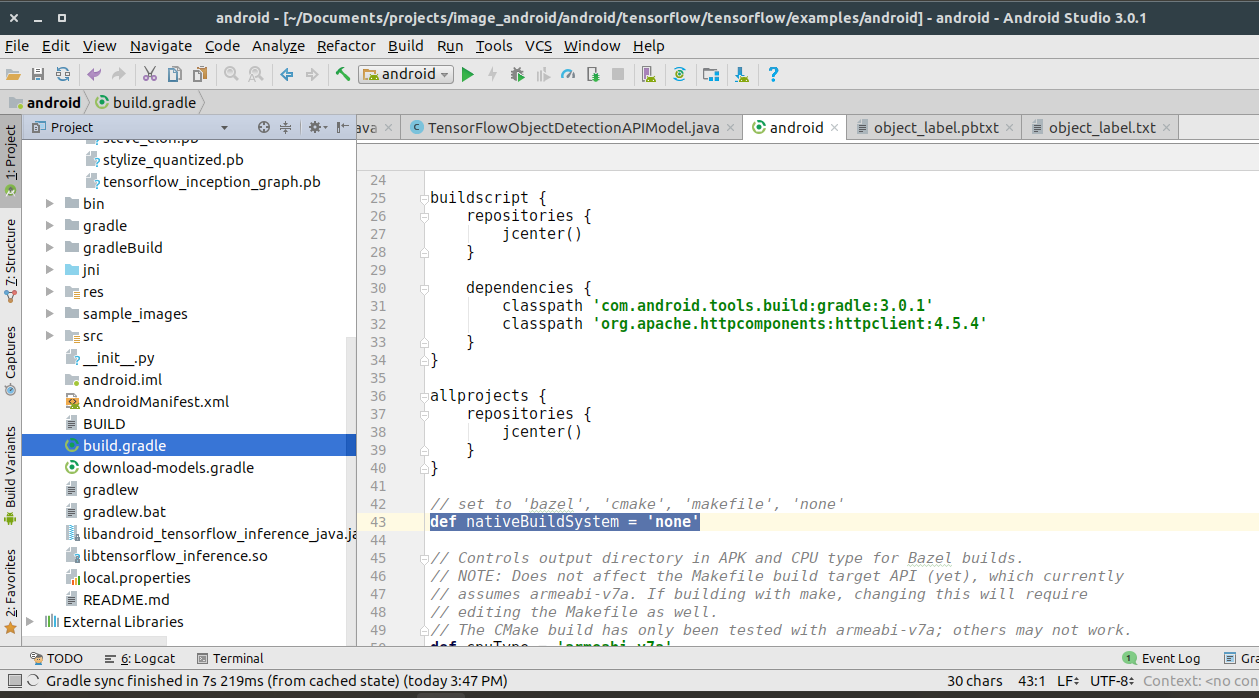
- Select your build.gradle file and change def nativeBuildSystem:'none'
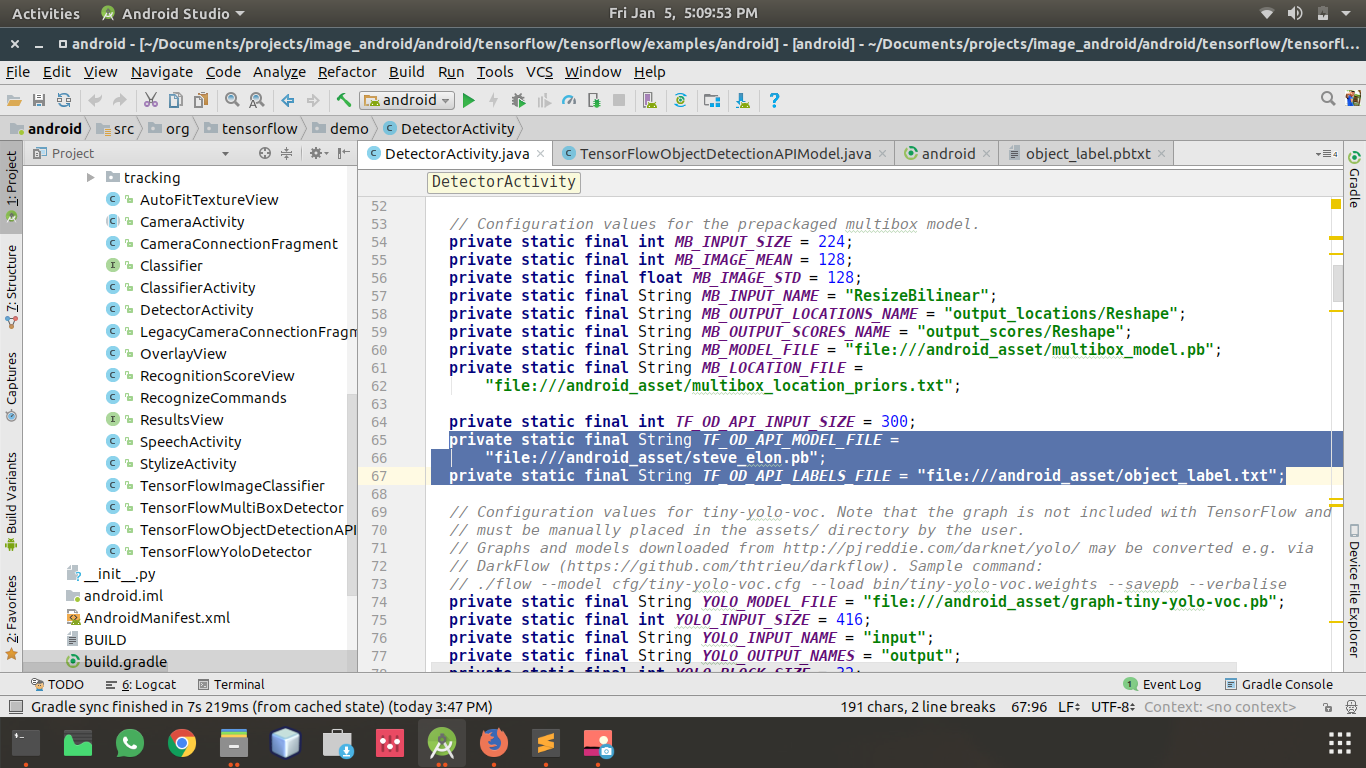
- Give your model path and label path to your project.Go to src>DetectorActivity.java in your project and change the path as if in the image below
- Great, thats it! Let's check if our android app detect Elon or Steve from the image. So Click the Run option .
FINAL OUTPUT:
Finally you must get the result like this. If not check your code or your model.
As soon as this feature hits production, start developing this cool stuff in your mobile. If you're stuck at any point and need help, comment in the section below and we'll get back to you. Happy Coding! 🙂