Addons and integrations are the most impactful features when it comes to building SaaS products. The reason being the more your tool integrates with others, the more reach and user base it gets. Basically when you integrate with popular tools or products like Gmail which is already used by millions of people, your product just gets super charged.
Today, you’ll learn how to build one such cool add-on for your app, and yes, it’s gonna run on Gmail.
Step 1: The Setup
One new thing about this, is that you don’t need to worry about your local environment when developing, as everything happens inside your browser on a platform called Google App Scripts
Navigate to http://script.google.com/home and create a new project from the sidebar option.
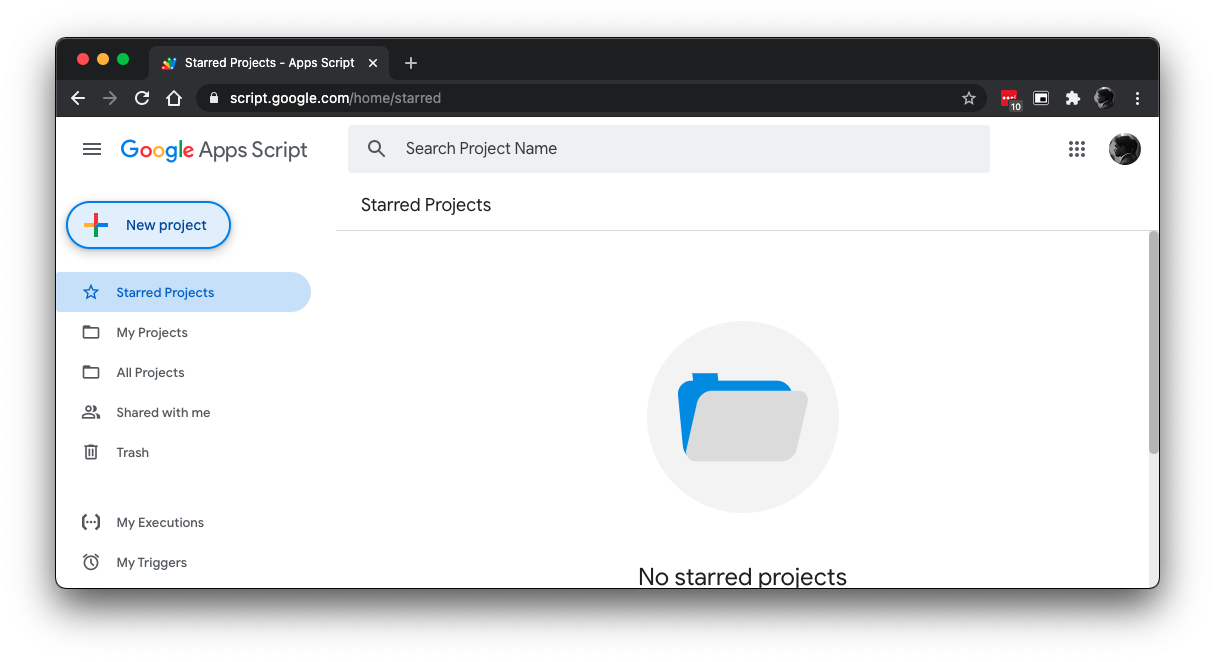
A new editor window opens where you’re going to spend most of your time building the addon.
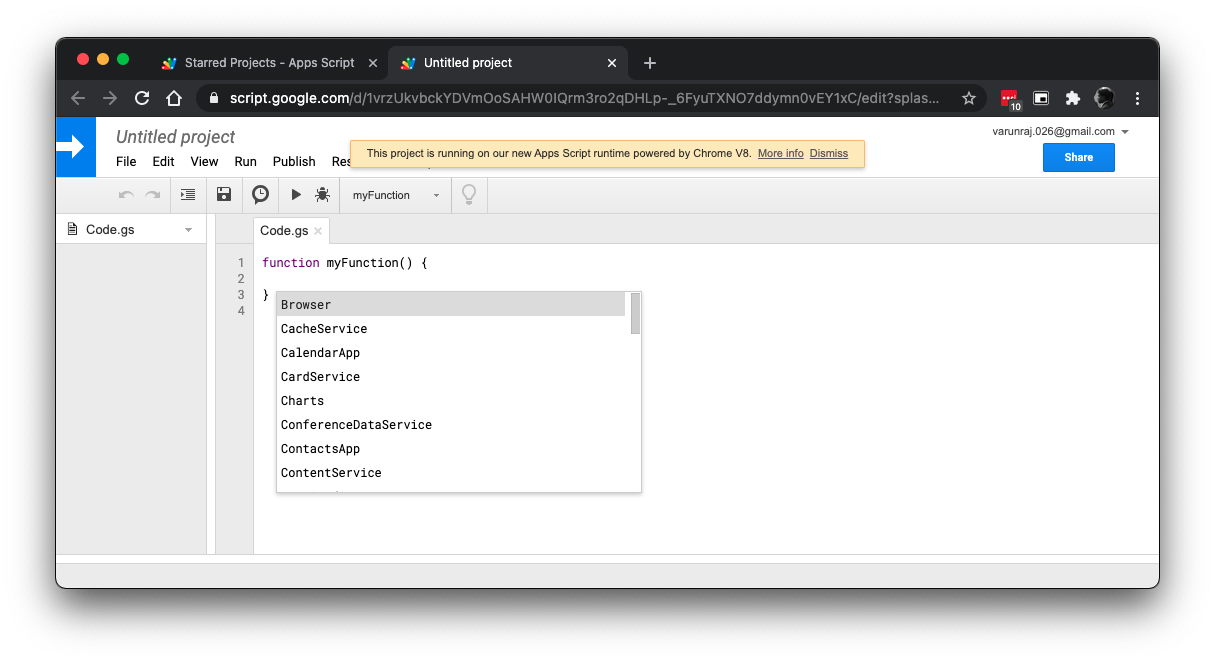
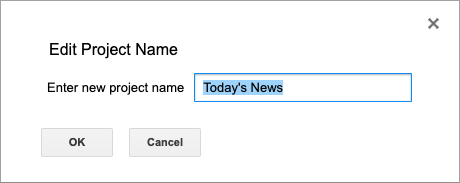
Click on the “Untitled project” to edit the project name to your app name, in my case I’m going to create an addon to show the latest news.
Once you name the project, you need to create a manifest file. It’s more like the manifest file we create for our Chrome Apps or an Outlook Plugin. It contains meta information, scope to access, and other such information about the app.
Click on “View → Show manifest file” from the menu bar and it opens a new file named “appsscript.json”
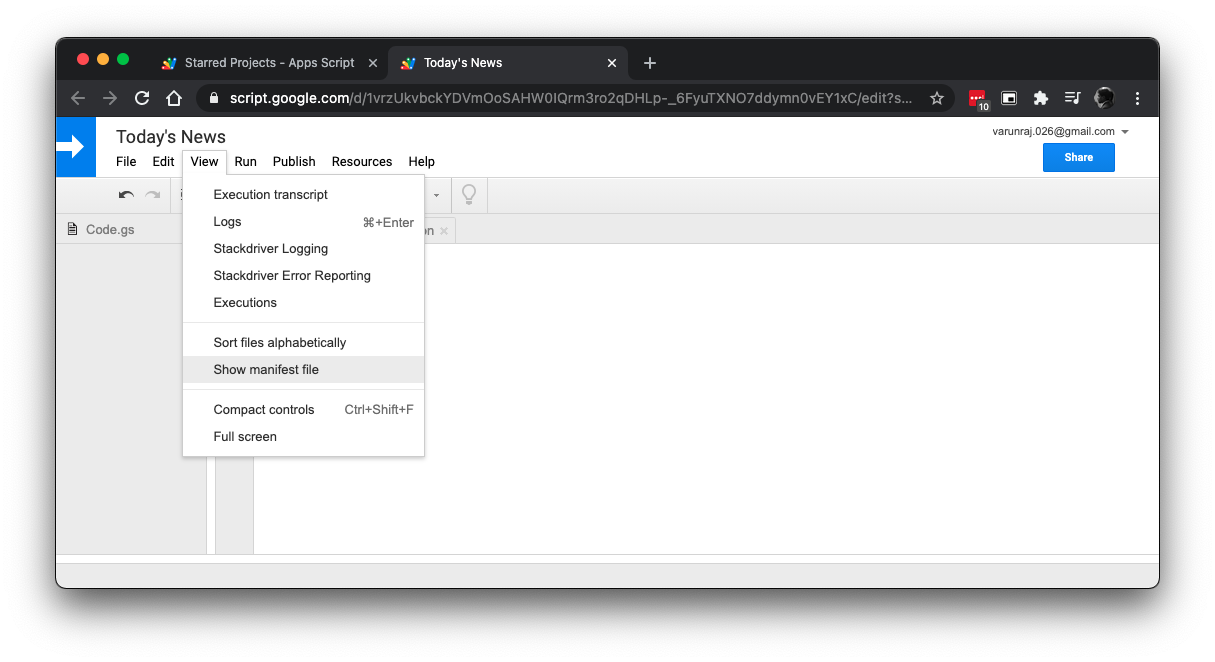
The contents of the manifest file is in JSON format and will hold the below information by default,
{ "timeZone": "Asia/Kolkata", "dependencies": {}, "exceptionLogging": "STACKDRIVER", "runtimeVersion": "V8"}Step 2: Configuration
Now that we’ve our base of the addon, let’s configure it to work in Gmail.
Under the dependencies section of the manifest add the gmail service with the following config,
"dependencies":{ "enabledAdvancedServices":[ { "userSymbol": "Gmail", "serviceId": "gmail", "version": "v1" } ] },After defining that we’re going to use the Gmail service, we need to define the behaviour, appearance of the addon inside Gmail.
Create a new block with the key “gmail” in the manifest root where you enter all the config of Gmail.
"gmail":{ "name": "Today's News", "logoUrl": "https://www.gstatic.com/images/icons/material/system/1x/receipt_black_24dp.png", "contextualTriggers":[ {"unconditional":{
},
"onTriggerFunction": "startApp" } ], "primaryColor": "#F47041", "secondaryColor": "#2E8B57", "version": "TRUSTED_TESTER_V2" }In the config above, the main part to notice is the contextualTriggers section. It’s an array of functions.
Currently we’re going to use a simple trigger onTriggerFunction, which as the name explains will get triggered when the app is opened in the addons section of Gmail. This will call a function defined in any of our .gs files.
There’s also other cosmetic configurations like name, icon and colors.
Step 3: Creating the UI
The UI is also created by the script in Gmail addon. Open the code.gs and create a new function called startApp. This function will be triggered when we open the app from the addons section.
Note: In app script the function names are unique no matter which file you write it.
Lets create a simple card in the UI
function startApp() { var card:CardService.newCardBuilder(); card.setName("NewsListCard").setHeader(CardService.newCardHeader().setTitle("News"));
var sectionNews:CardService.newCardSection();
sectionNews.addWidget(CardService.newTextParagraph().setText("News of the day"));
return card.addSection(sectionNews).build();}Save the file and lets try to run and see the result
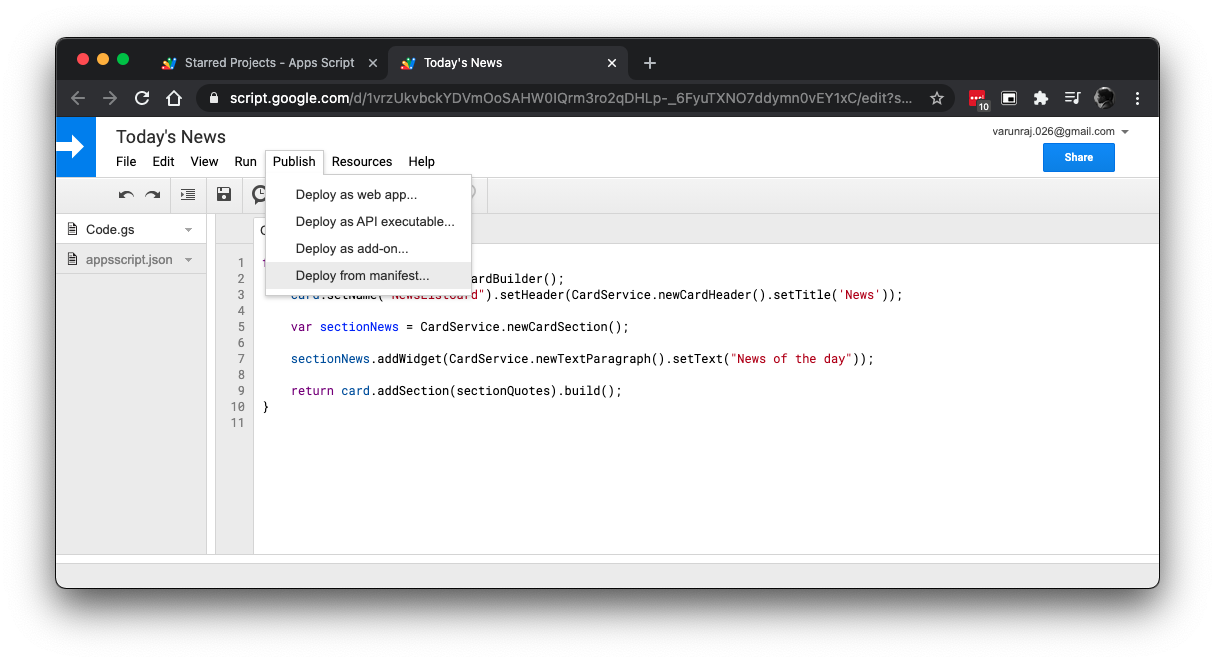
To test the addon, click on “Publish → Deploy from manifest” in the menu bar,
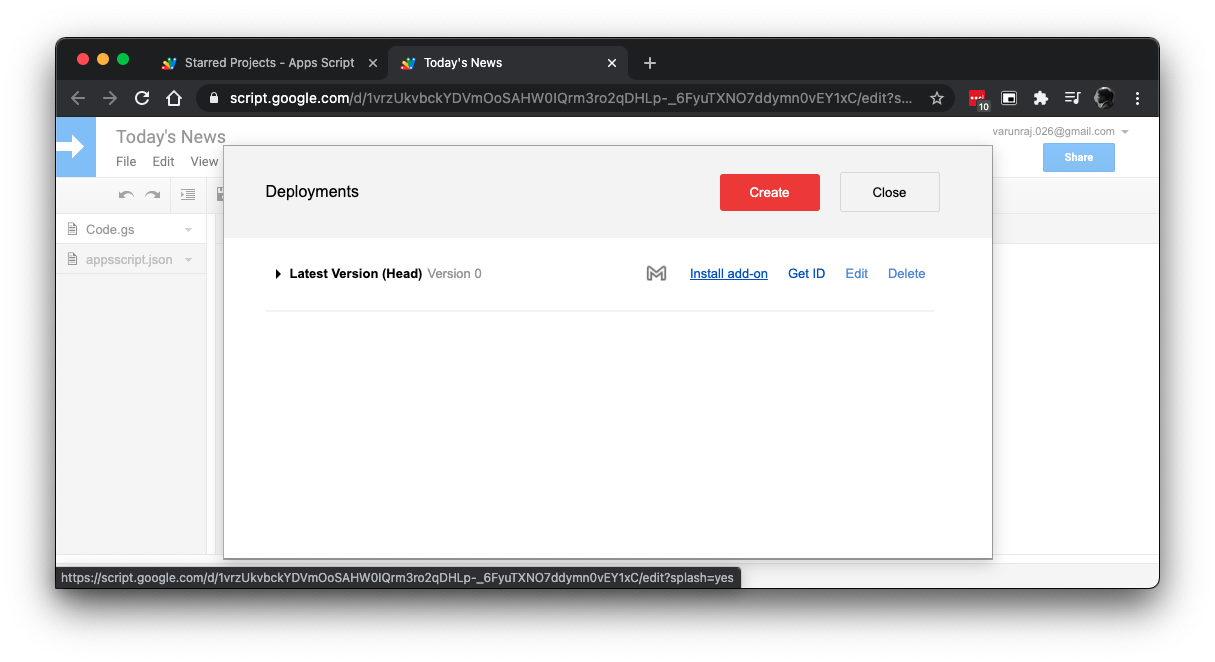
This brings up another window that lists all the versions of your addon. Click on the Install add-on button in the “Latest Version (Head) Version 0” since this is the development version.
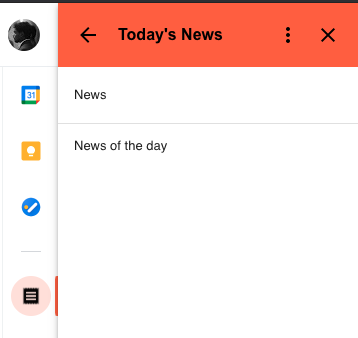
Once installed, you can open your Gmail account (the one where the app script project was created) to see the addon in the sidebar.
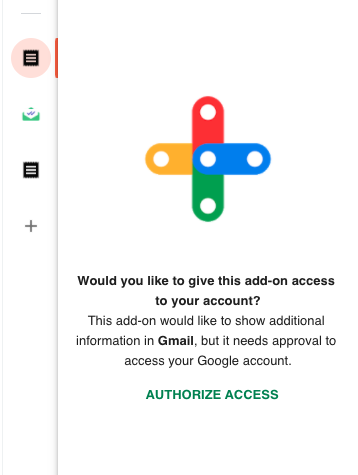
In the first run, you need to authorize access to the app to use it. After authorization you can see the cards that we created in the script.
Step 4: Loading Data From API
We’ve set up the basic card section to show the basic static information of the app. Now let’s try to pull in some data from remote API to show in the addons section. Currently I’m going to use a public API for the demo purpose, but you can also use your own APIs to pull your app’s data.
For this demo I’m going to use https://newsapi.org/ API since it has a free plan and public.
Sign up for the News API Service and get your API token.
We’ll be using the UrlFetchApp class to make external API calls. For writing clean code, I’ve created a new file called “APIs.gs” from the file menu

Write the below function to make an API call to the new API with your token in the payload to get the news articles.
function getNews() { var response:UrlFetchApp.fetch("http://newsapi.org/v2/top-headlines?country=us", { method: "GET", muteHttpExceptions: true, headers: { "X-Api-Key": "YOUR NEWS API KEY HERE", }, });
Logger.log(response.getContentText()); var responseText:response.getContentText(); var responseJSON:JSON.parse(responseText); return responseJSON;}Now that our API call is ready, let’s call it and render the data in the UI. Open your Code.gs file and add the following
function startApp() { // ..... var newsResult:getNews(); var news:newsResult.articles;
for (var i:0; i < news.length; i++) { var newsItem:news[i]; var newsBlock:CardService.newDecoratedText().setText(newsItem.title); sectionNews.addWidget(newsBlock); }
// ….. // ..... return card.addSection(sectionNews).build();}This will call the getNews function and render each item into the sectionNews Card section.
Save the file and refresh the addon from your Gmail addon panel.
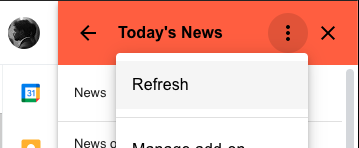
After refreshing you’ll get the list of news title in the addon screen
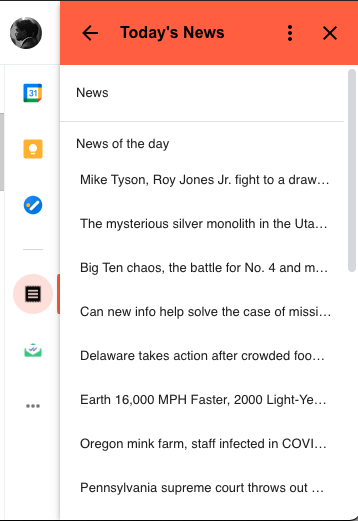
And we’ve created a simple addon which can list your daily news inside Gmail! This can be your app’s addon too. The best part is that most of your business users can adopt it so quickly which helps your app grow faster.
In the next article, I’ll write about how to use user credentials to get the current user info and also session storage. Until then, keep exploring! :D
Subscribe to our newsletter
Get the latest updates from our team delivered directly to your inbox.
Related Posts
10 Gems in Ruby that you will love
Let's go back to basics with Ruby on Rails and see some of the Gems that we use everyday at skcript. #StartWithSkcript
#100DaysOfCommits
Our CTO, Swaathi, talks about our commitment to the #100DaysOfCommit challenge. Join us.
18 Python packages you should be using right now
Let us look at some python packages that will get you started on your machine learning path #StartWithSkcript

